How to Set Up and Get a Slack Incoming Webhook
To receive notifications from Fail2Notify, you need to generate a Webhook URL on the Slack side.
This guide explains the currently recommended method: creating a Slack App to obtain an Incoming Webhook URL.
✅ About “Deprecated” Information You May Find Online
You may see articles stating that “Incoming Webhooks are deprecated or discontinued.” This refers to the old custom integrations system.
The Incoming Webhooks introduced in this guide, which are created via a Slack App, are an officially supported and recommended standard feature by Slack.
You can safely use this method.
Reference (Official Documentation): Sending messages using Incoming Webhooks | Slack API
Overview of the Steps
- Create a Slack app in the Slack API dashboard
- Enable Incoming Webhooks
- Select a channel and generate the Webhook URL
Step 1: Create a Slack App
First, log in with a Slack administrator account and open the following Slack API page:
URL: https://api.slack.com/apps
- Click the [Create New App] button at the top-right (or center) of the page.
- When the popup appears, select [From scratch].
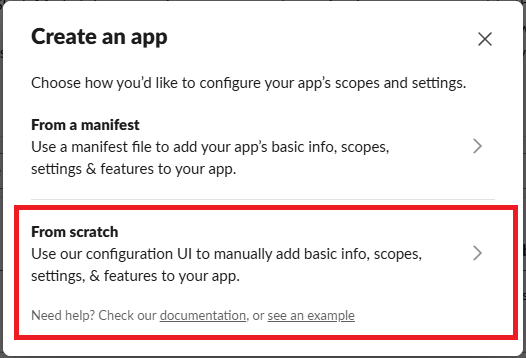
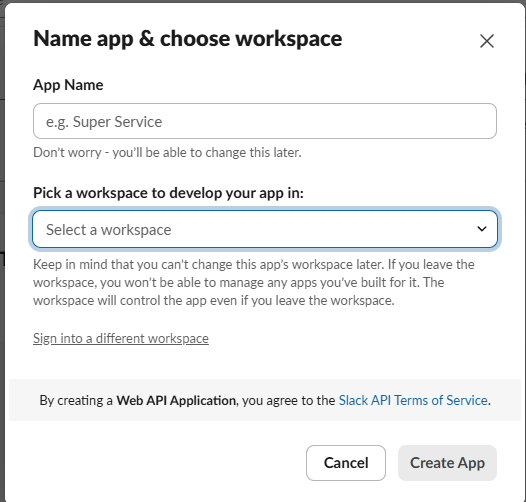
- On the app creation screen, enter the following information and click [Create App]:
- App Name:
Fail2Notify(or any name you prefer — this will appear as the sender name) - Pick a workspace…: Select the Slack workspace where notifications will be sent
- App Name:
Step 2: Enable Incoming Webhooks
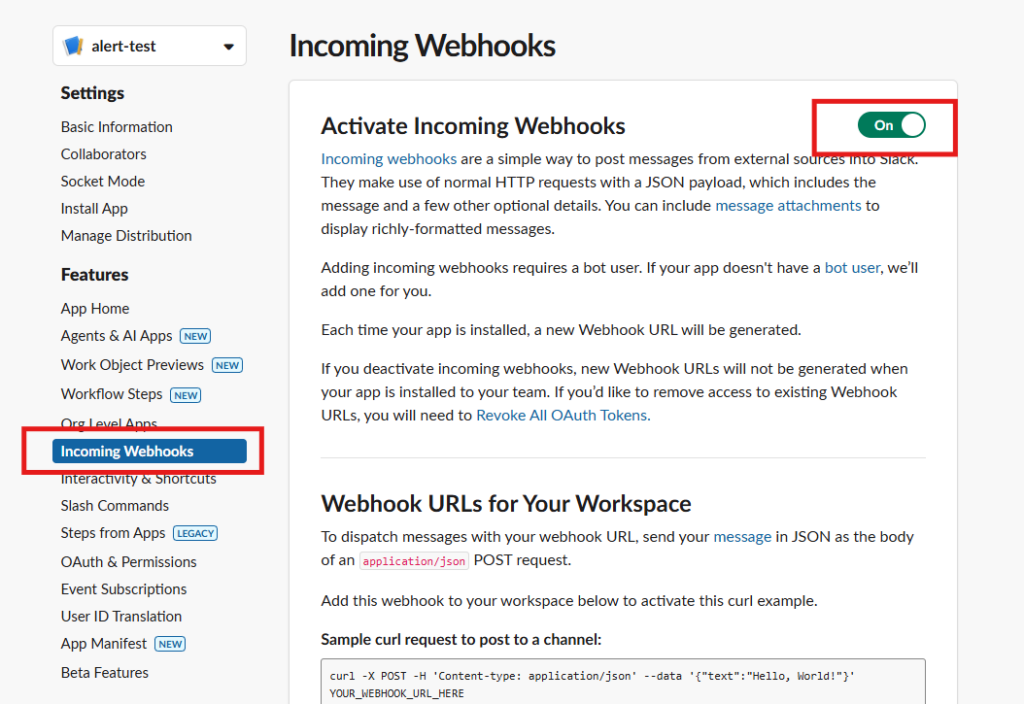
After creating the app, you will be redirected to the Basic Information settings page.
- Click [Incoming Webhooks] from the left-hand menu.
- Turn the [Activate Incoming Webhooks] toggle to On.
Step 3: Link a Channel and Generate the Webhook URL
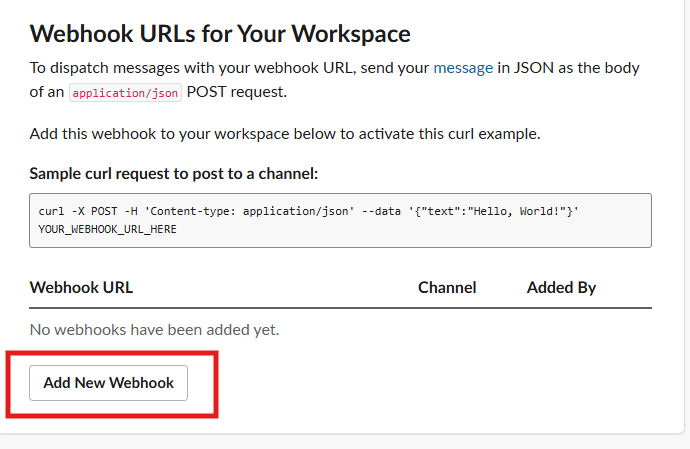
Once Incoming Webhooks are enabled, a new section will appear at the bottom of the page.
- Click the [Add New Webhook to Workspace] button at the bottom of the page.
- A permission request screen will appear. From the [Select a channel] dropdown, choose the channel where notifications should be sent (e.g.
#generalor#error-alerts). - Click the [Allow] button.
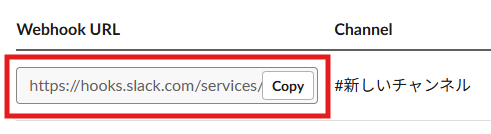
Step 4: Copy the Webhook URL
After returning to the settings page, you will see the newly created URL listed under Webhook URLs for Your Workspace.
- Click the [Copy] button next to the URL to copy it.
Note: The URL will start withhttps://hooks.slack.com/services/....
Step 5: Configure Fail2Notify
Finally, return to the WordPress admin dashboard.
- Go to [Settings] > [Fail2Notify].
- Paste the copied URL into the Webhook URL field under Slack Notifications.
- Make sure [Enable Slack alerts] is checked, then save the settings.
That’s it! The setup is now complete.